domingo, 27 de diciembre de 2015

Grouping Rows in Oracle

Hi,

How many times do you want to show some "properties" of a key value, and the result set means more than a single row?

For instance, you have the following SQL Statement.


In this case, there are 4 rows matching the statement.
Oracle has introduced in the Oracle 11g Release 2 the LISTAGG function which allows us to have the same result set but grouping it in a single row
Here you have how it works:


SELECT ROLEUSER, LISTAGG(ROLENAME, ' - ') 
          WITHIN GROUP (ORDER BY ROLENAME)   AS ROLENAME
FROM PSROLEUSER
WHERE ROLEUSER = 'VP1'    

GROUP BY ROLEUSER

In the example, I am asking for all the ROLENAME values, that match to the GROUP BY clause. I am also ordering it by ROLENAME, and separating them with the " - " character.

Here you have the results:


But unfortunately, I also have bad news.
As I told you, this function only works from version Oracle 11g Release 2 onwards.

If you are running older versions there is also a way of solving it, but it's not documented. So, if you have to use it, do it carefully.

SELECT ROLEUSER, WM_CONCAT(ROLENAME) AS ROLENAME
FROM PSROLEUSER
WHERE ROLEUSER = 'VP1'
GROUP BY ROLEUSER

MySQL
In this language there is also a function that helps us with this item. In this case, it is called GROUP_CONCAT

SELECT ROLEUSER, GROUP_CONCAT(ROLENAME) AS ROLENAME
FROM PSROLEUSER
WHERE ROLEUSER = 'VP1'
GROUP BY ROLEUSER

SQL SERVER
I haven't seen a function in SQL Server similar to these ones. I am afraid in this language we should solve it by using a recursive sub-Query in the SELECT statement, such as:

SELECT A.ROLEUSER
    , (   SELECT  B.ROLENAME + ' - '
          FROM PSROLEUSER B
          WHERE B.ROLEUSER = A.ROLEUSER  
          FOR XML PATH('') ) AS ROLENAME
FROM PSROLEUSER A
WHERE A.ROLEUSER = 'VP1'
GROUP BY A.ROLEUSER


And that's all.
I hope this blog could be so useful to you as it is to me.

Regards.
Facundo Salerno.

viernes, 11 de septiembre de 2015

Integration Broker - Synchronous Service.

Hi!

As you saw in my last post I have been talking about creating a new Asynchronous Service through the Integration Broker in PeopleSoft.

Today let me show you an example of a Synchronous Service. Further more, I will create a non-rowset based message to be used as a response message, just to get a more detailed example.

I am afraid some pictures are too wide so they are not being properly shown. If you click them you will see it at its real size.

In the last Post I have created 3 new employees in my custom table.


Let's think we now want to create a Service that will  receive a Rowset based message.
Using this message we will save the countries that were visited by any of our employees, validating both employee and country exist in the database.

First of all let's create the new table VISITED_COUNTRY with 3 fields
1) Employee that has travelled
2) Country that was visited
3) A description of the trip.


I 'll create the Rowset-Based Message that will receive this information.
As you see in the last post, we must go to: Root > PeopleTools > Integration Broker > Integration Setup > Messages.
there I will set some required info and Save. (if you have any doubts about this item just see my last Blog here.


Now let's see the second tab "Schema". Here we can see the schema of the current message. Since it is a Rowset based message the schema is auto-generated, but we will need this information later, so let's save it in a new TXT file.


The following step is creating the Response Message.
As I told you before, it will be a NonRowset Message:


As you can see the schema was not created in this case, since we are not using any record. So we will modify the saved schema and upload it to our new message:

We are going to send an XML document as a response. The structure of our document will be, for isntance

<FSAL_VISITED_COUNTRY_RESP>
     <VISITED_COUNTRY_RESP>
         <ERROR_FOUND></ERROR_FOUND>
         <DESCR254></DESCR254>
    </VISITED_COUNTRY_RESP>
</FSAL_VISITED_COUNTRY_RESP>

Let's see some important data in the message


As you can see we have the Message Name and Message Record. We must change this information by the new message information.

In my case the new message name is "FSAL_VISITED_COUNTRY_RESP"
The previous message name is "FSAL_VISITED_COUNTRY"
and the previous record name is "VISITED_COUNTRY".

Since we are going to send a XML document, we can create a new "header" Tag as "VISITED_COUNTRY_RESP".

So we are going to replace
Message: FSAL_VISITED_COUNTRY -> FSAL_VISITED_COUNTRY_RESP
Record: VISITED_COUNTRY -> VISITED_COUNTRY_RESP

As you noticed we are only adding a "_RESP" at the end. So let's replace VISITED_COUNTRY by VISITED_COUNTRY_RESP in all the document and we will have this step done.


Now let's remove the PSCAMA Record information, since we are not going to use it in our message.


And later in the document:


So, we must change all the Field information of the PSCAMA fields
For each field in the record we must remove the complexType  "_TypeShape" and simpleType "_TypeDef" tags

 <xsd:complexType name="AUDIT_ACTN_TypeShape">
  <xsd:simpleType name="AUDIT_ACTN_TypeDef">


Just to make the last step easier, in the original file we must remove from line 126 to line 257


So we have now removed all the PSCAMA information. Modify the record structure to adapt to our XML structure that was previously shown:

<FSAL_VISITED_COUNTRY_RESP>
     <VISITED_COUNTRY_RESP>
         <ERROR_FOUND></ERROR_FOUND>
         <REASON></REASON>
    </VISITED_COUNTRY_RESP>
</FSAL_VISITED_COUNTRY_RESP>

We have already modified green lines. So let's work with the record fields:

As we have previously done we will replace the EMPLID string by ERROR_FOUND in all the document:


And where the field is set we must change the original information by our new settings:


Since we are not using the country field, let's remove the following tags


And change the DESCR254 field by the REASON tag


The last step is changing the original schema xmlns information by our schema info:
So we must replace line two information:
<xsd:schema xmlns:xsd="http://www.w3.org/2001/XMLSchema"> 
by our schema information:
<xsd:schema xmlns:xsd="http://xmlns.oracle.com/Enterprise/Tools/schemas/FSAL_VISITED_COUNTRY_RESP.version_1"> 

So the final content of our schema file is:


Now let's return to the Messages Page, and go to the Schemas tab. There you have to click the "Add Schema" button.
We can upload the file or write it in the text area. Once we save the schema is properly uploaded.


Go to Root > PeopleTools > Integration Broker > Integration Setup > Services.
We will create the new FSAL_VISITED_COUNTRY and save. Then add a new Service Operation called FSAL_VISITED_COUNTRY. This Service Operation will be SYNCRHONOUS.


In the Service Operation we must add a description.


And we also must create routings and set the Request and Response Messages
Request will be FSAL_VISITED_COUNTRY.version_1
Response will be FSAL_VISITED_COUNTRY_RESP.version_1


If we go to the second tab "Handlers" we should set the handler that will process this service operation, but we have to develop it first.


Let's go to the Application Designer and create a new Application Class "FSAL_VISITED_COUNTRY_Handler". I will add it to my previously created Package.


In this case our class must implement the "PS_PT:Integration:IRequestHandler" class, so don't forget importing it.

How is it developed? Here you have a quick example 


Once we finish the development we will continue with the service operation settings.
Lets go to Root > PeopleTools > Integration Broker > Integration Setup > Service Operations.

Search the FSAL_VISITED_COUNTRY Service Operation and go to the Handler Tab.

In this case the handler name is not important since it will be after replaced by the system.
I have set it up as "On Request" since it will work when the system "is requested" for information from our service
In the Implementation Field I have chosen "Application Class" since I will insert the new information through the Application Class I have created.


Let's go to the "details" link. In this page we will add the Application Class details, such as the root to the get it and the method that will be executed when a new message comes.
You will notice the only option to choose is our new class, in spite of having the FSAL_NEW_EMPL_Handler that we created in my previous Post. 
The reason is quite simple, since it is a Synchronous Service it will only shows the classes that implement the "PS_PT:Integration:IRequestHandler" class.


So our configuration will be set as it follows:


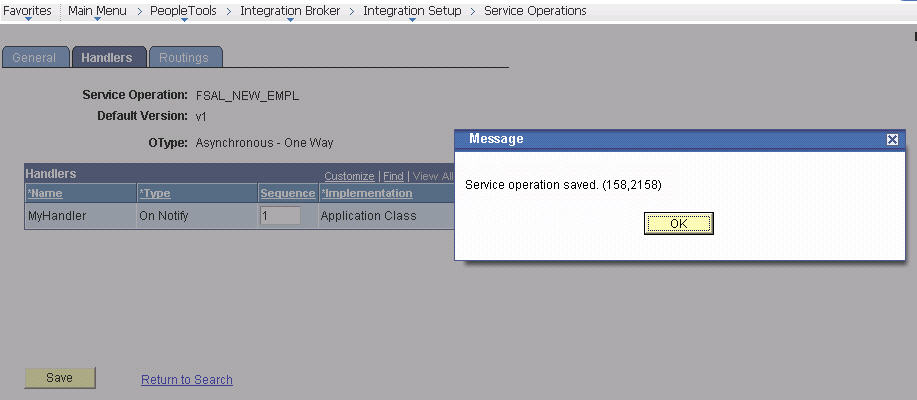
We save the Service Operation and our developing work finishes here.
Let's test our development

Go to Root > PeopleTools > Integration Broker > Service Utilities > Handler Tester and choose the previously created Service Operation and add the handler:

Let's insert an invalid employee and country (we are testing all the possible scenarios ). 


When we "Execute the Event" the response is shown in the same page:
   <ERROR_FOUND>YES</ERROR_FOUND>
    <REASON>Employee does not exist</REASON> 


Now let's change to employee 0000000001 (Facundo Salerno). As you could see now the reason has changed because the country was also invalid.


We finally add a valid country such as ARG (Argentina) and the insert is finally done.


If we check at the database, we could see the information was properly added. 


Let's Test the Service Operation: 
First of all grant access to the Service:


Go to Root > PeopleTools > Integration Broker > Service Utilities > Service Operation Tester.
Search our service operation:

When working with Synchronous Services there are no Queues involved since the other system is waiting for our response.
We will add a new valid transaction values and "invoke the operation". 
As you could see, the Service Operation  was properly executed and the results are shown.


And the new row was added to the database.


We could also create a WSDL Service, but there is no need to explain it again since I have done it  in this post.

I hope this blog could be so useful to you as it is to me.

Regards.
Facundo Salerno.

martes, 25 de agosto de 2015

Integration Broker - Asynchronous Service.


Hi all,

Today I want to talk about Integration Broker.
For instance, let's think we want to create a Asynchronous Service that will receive new employees to be saved in our database.


1) Create the table where we want to save new employees.


2) Create a new Message through which we will receive new information.
We must go to: Root > PeopleTools > Integration Broker > Integration Setup > Messages.
There we must add a new value:


3) It will be set a Rowset type since we will receive a rowset-based XML File. We mill also add a version to the message, since we could update it later.


4) Once we have created it we can add a description and start developing the structure.
We will add a new record to the Root of the message. It is done by clicking the next link.


5) I will chose the FSAL_NEW_EMPL. The added record will appear at the bottom of the page.


6) If we want to add child rowsets to this record we can do it by clicking the record. the following screen appears:


We can also uncheck any field if we don't want it to be part of the message.

7) The next step is creating a Queue. We need a Queue since our system will be receiving new service operations and processing them as soon as possible.
Let's create it in: Root > PeopleTools > Integration Broker > Integration Setup > Queues.
We only need to add a name and a description to have it created.


8) We are now able to create a new Service..
Root > PeopleTools > Integration Broker > Integration Setup > Services.


Once we have it created, we can add a NEW Operation Service at the bottom area.
We must choose "Asynchronous - One Way" type since we are going to receive and process information, but there is no answer.


As you could see in the following pic. this action can also be done by going to Root > PeopleTools > Integration Broker > Integration Setup > Service Operations.


Every Asyncronous - Service Operation needs some special steps.

As you could see in the following picture we don't have a "Any-To-Local" Routing yet.
As we will need it to receive service operations we will create it by checking the "Generate Any-To-Local" option.
We also need to add the message version and queue that will process the incoming messages.


If we go to the third page in the component we now can see the Routing was created. Besides we can see it is an INBOUND Routing, and it is now Active.


Before talking about the "Handlers" page you must pause this configuration and decide how to "handle" the incoming values.
In this case I will process it with an Application Class. So let's create it in the Application Designer:


Take into consideration our new Class must implement the PS_PT:Integration:INotificationHandler class.
As I am going to execute a method when the system notifies the message I will create a new method called "OnNotify", that will receive the Message to be processed.
So the structure of our new class will be something like the following image.


The "OnNotify" method is the final step of the process. So here you must add all the PeopleCode logic you will need to process your information.
In this example, logic will be very simple:


Now let's go back to the Service Operation. As I told you before, we must complete the "Handlers" page.

In this case we will use a new handler that I have called "MyHandler".
I have set it up as "On Notify" since it will work when the system "is notified" that new information has come.
In the Implementation Field I have chosen "Application Class" since I will insert the new information through an Application Class as we have seen before.


Let's go to the "details" link. In this page we will add the Application Class details, such as the root to the get it and the method that will be executed when a new message comes.


Now we can properly save the Service Operation.
Most of the configuration is done at this step.


Let's start testing our Handler:
Go to Root > PeopleTools > Integration Broker > Service Utilities > Handler Tester and choose the previously created Service Operation


In this page we must select our Handler type and Name. And we can create a testing incoming message by filling the structure at the bottom area. If you have a real incoming XML File, you could add it by clicking the "Provide XML" button.


Once we have it filled we can execute the event by clicking the Button.
At this point if we have any error it will be displayed next to the message structure.
In this case everything has worked as expected so the "Done" message appeared.


If we check at the database, the new row was inserted.


We can also test the Complete Service Operation:
Go to Root > PeopleTools > Integration Broker > Service Utilities > Service Operation Tester.
Choose the previously created Service Operation
As you noticed, this page looks like the "Handler Tester" one, and it works in a similar way.
We will fill a new Employee data and clik in the "Invoke Operation" button


If everything has worked as expected you will receive a transaction ID. This is because Operation was published in our system.


Now we could check the incoming message status in the following path:
Root > PeopleTools > Integration Broker > Service Operations Monitor > Monitoring > Asynchronous Services.
Here you will see our Queue appears:


If we click the number link in the "Done" column we will able to see all the Done transactions in this queue.
Once we are inside this link we can click the "Details" and take a look to our service operation:


Here you will notice we have no access on this Service Operation.


We must set it up in a Permission List, at the "Web Services" page.


If we go back to the details page, now we can check the XML file. On the other side, if the service operation fails, you will be able to check the reasons in this page.


And the new employee was properly inserted.


If we want to create a WSDL Service we must go to
Root > PeopleTools > Integration Broker > Web Services > Provide Web Service.
In this page we must search our service:


Then choose the Service Operation


If we want to check the WSDL we could do it in the next step


The last step is choosing the WSDL Repository option.


Now the WSDL Service was created and we can use it with the following link.


We can test it with teh SoapUI software.
We create a new Project in this application and add the WSDL link.
Then we add a new Employee information and click the "Play" button


Since this service does not send back any information we only see the confirmation info.


If we check the database, the third Employee was added.


And that's all.
I hope this blog could be so useful to you as it is to me.

Regards.
Facundo Salerno.