Hi all,
Today I want to talk about Integration Broker.
For instance, let's think we want to create a Asynchronous Service that will receive new employees to be saved in our database.
1) Create the table where we want to save new employees.

2) Create a new Message through which we will receive new information.
We must go to: Root > PeopleTools > Integration Broker > Integration Setup > Messages.
There we must add a new value:

3) It will be set a Rowset type since we will receive a rowset-based XML File. We mill also add a version to the message, since we could update it later.

4) Once we have created it we can add a description and start developing the structure.
We will add a new record to the Root of the message. It is done by clicking the next link.

5) I will chose the FSAL_NEW_EMPL. The added record will appear at the bottom of the page.

6) If we want to add child rowsets to this record we can do it by clicking the record. the following screen appears:

We can also uncheck any field if we don't want it to be part of the message.
7) The next step is creating a Queue. We need a Queue since our system will be receiving new service operations and processing them as soon as possible.
Let's create it in: Root > PeopleTools > Integration Broker > Integration Setup > Queues.
We only need to add a name and a description to have it created.

8) We are now able to create a new Service..
Root > PeopleTools > Integration Broker > Integration Setup > Services.

Once we have it created, we can add a NEW Operation Service at the bottom area.
We must choose "Asynchronous - One Way" type since we are going to receive and process information, but there is no answer.

As you could see in the following pic. this action can also be done by going to Root > PeopleTools > Integration Broker > Integration Setup > Service Operations.

Every Asyncronous - Service Operation needs some special steps.
As you could see in the following picture we don't have a "Any-To-Local" Routing yet.
As we will need it to receive service operations we will create it by checking the "Generate Any-To-Local" option.
We also need to add the message version and queue that will process the incoming messages.

If we go to the third page in the component we now can see the Routing was created. Besides we can see it is an INBOUND Routing, and it is now Active.

Before talking about the "Handlers" page you must pause this configuration and decide how to "handle" the incoming values.
In this case I will process it with an Application Class. So let's create it in the Application Designer:

Take into consideration our new Class must implement the PS_PT:Integration:INotificationHandler class.
As I am going to execute a method when the system notifies the message I will create a new method called "OnNotify", that will receive the Message to be processed.
So the structure of our new class will be something like the following image.

The "OnNotify" method is the final step of the process. So here you must add all the PeopleCode logic you will need to process your information.
In this example, logic will be very simple:

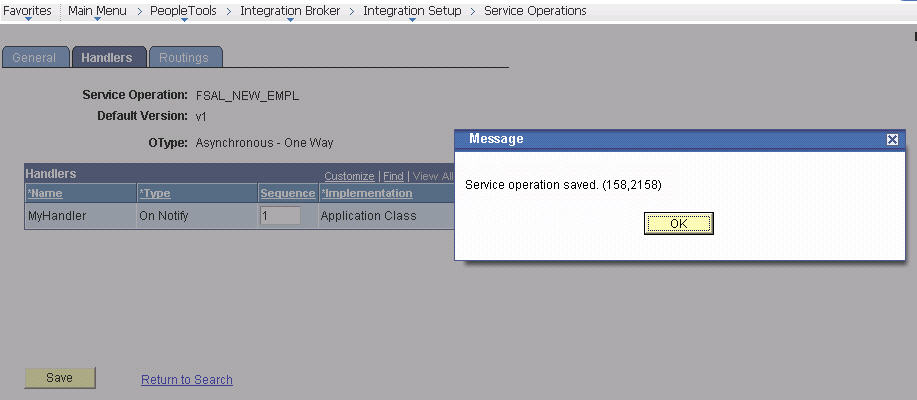
Now let's go back to the Service Operation. As I told you before, we must complete the "Handlers" page.
In this case we will use a new handler that I have called "MyHandler".
I have set it up as "On Notify" since it will work when the system "is notified" that new information has come.
In the Implementation Field I have chosen "Application Class" since I will insert the new information through an Application Class as we have seen before.

Let's go to the "details" link. In this page we will add the Application Class details, such as the root to the get it and the method that will be executed when a new message comes.

Now we can properly save the Service Operation.
Most of the configuration is done at this step.
Let's start testing our Handler:
Go to Root > PeopleTools > Integration Broker > Service Utilities > Handler Tester and choose the previously created Service Operation

In this page we must select our Handler type and Name. And we can create a testing incoming message by filling the structure at the bottom area. If you have a real incoming XML File, you could add it by clicking the "Provide XML" button.

Once we have it filled we can execute the event by clicking the Button.
At this point if we have any error it will be displayed next to the message structure.
In this case everything has worked as expected so the "Done" message appeared.

If we check at the database, the new row was inserted.

We can also test the Complete Service Operation:
Go to Root > PeopleTools > Integration Broker > Service Utilities > Service Operation Tester.
Choose the previously created Service Operation
As you noticed, this page looks like the "Handler Tester" one, and it works in a similar way.
We will fill a new Employee data and clik in the "Invoke Operation" button

If everything has worked as expected you will receive a transaction ID. This is because Operation was published in our system.

Now we could check the incoming message status in the following path:
Root > PeopleTools > Integration Broker > Service Operations Monitor > Monitoring > Asynchronous Services.
Here you will see our Queue appears:

If we click the number link in the "Done" column we will able to see all the Done transactions in this queue.
Once we are inside this link we can click the "Details" and take a look to our service operation:

Here you will notice we have no access on this Service Operation.

We must set it up in a Permission List, at the "Web Services" page.

If we go back to the details page, now we can check the XML file. On the other side, if the service operation fails, you will be able to check the reasons in this page.

And the new employee was properly inserted.

If we want to create a WSDL Service we must go to
Root > PeopleTools > Integration Broker > Web Services > Provide Web Service.
In this page we must search our service:

Then choose the Service Operation

If we want to check the WSDL we could do it in the next step

The last step is choosing the WSDL Repository option.

Now the WSDL Service was created and we can use it with the following link.

We can test it with teh SoapUI software.
We create a new Project in this application and add the WSDL link.
Then we add a new Employee information and click the "Play" button

Since this service does not send back any information we only see the confirmation info.

If we check the database, the third Employee was added.

And that's all.
I hope this blog could be so useful to you as it is to me.
Regards.
Facundo Salerno.
No hay comentarios:
Publicar un comentario